Kayana EPOS Unbox and Set Up
When you unbox the device, you will find:
- EPOS
- Power Cable
- Ethernet Cables
This guide provides a comprehensive overview of setting up the Kayana EPOS system.
Comparing the 16″ Dual Screen and the 10″ portable
In certain situations, size does matter. Our 16″ EPOS till system distinguishes itself from the smaller 10″ models by offering a larger size, which includes a spacious 10″ secondary screen for customers to view their orders quickly.


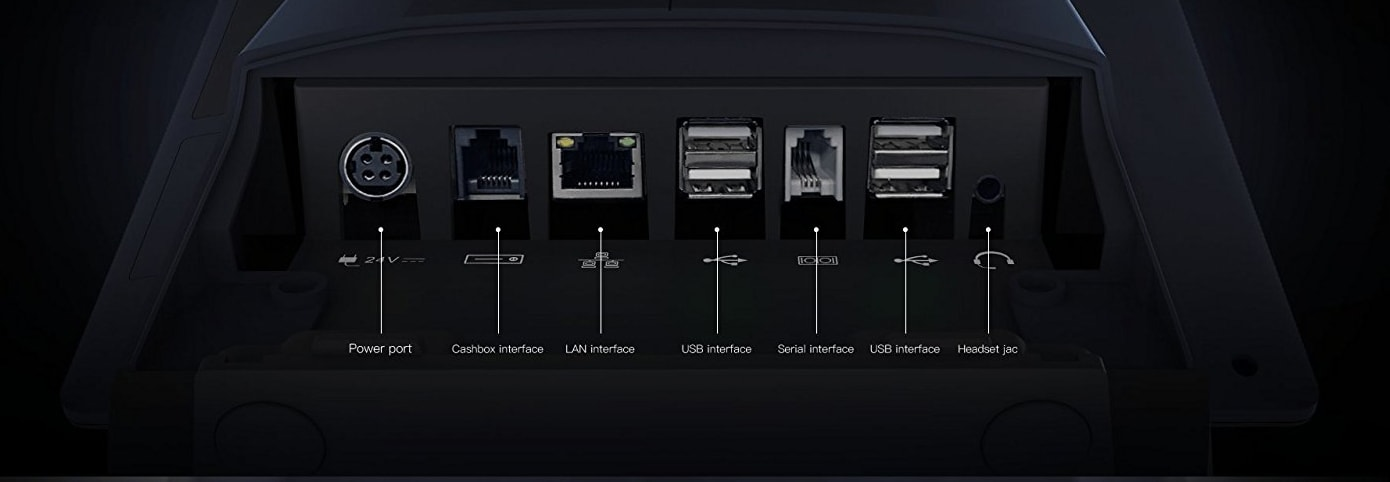
Connecting the power to your device
16″ EPOS
The power port for the 16″ device can be found beneath the main screen. When connecting the device, ensure the kettle lead is firmly attached to the power pack.
10″ EPOS
The power port for the 10″ device can be found on the client-facing side, and you need to remove the cover to access it. When connecting the device, ensure the kettle lead is firmly attached to the power pack.
Lift the cover and attach the power cable. (dhika to make new images for both 15.6 and 10″)

Powering on the EPOS
To power on your 16″ EPOS, select the power button located underneath the main screen. (andhika to supply drawing)
To power on your 10″ EPOS, select the power button located to the side the main screen. (andhika to supply drawing)
Setting up the Countertop Printer
For both devices, the printer is connected via a USB cable. Once the cable is connected, go to settings and click connect USB printer.
Select the printer and now the printer will beep to confirm it is connected.
Pairing Card Reader
For both devices, the Card Reader need to be connected to the internet. Once connected, go to settings and card reader from the card reader list.
On the back of the card reader, you will see a serial number. Make sure you match the right card reader to the till.
How to Set the Cash Drawer Up on your (Duo) Countertop Device
To set up your Cash Drawer on your EPOS, follow these steps:
- Insert the cable attached to the back of the cash drawer into the labelled port at the back of the printer as shown below
Make sure your printer is connected in the till software.